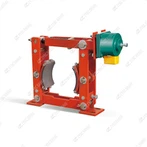
Maintaining the DJPZ-80 series motor disc brake (a compact, motor-integrated electromagnetic disc brake commonly used for servo motors, stepping motors, and small industrial motors) requires targeted checks for its integrated structure, electromagnetic components, and friction system. Below is a step-by-step maintenance guide tailored to its design features:
1. Daily Inspection (Before Startup & After Shutdown)
The DJPZ-80 is directly mounted on the motor end, so daily checks focus on quick verification of its connection, release state, and surface condition (5–8 minutes per brake):
Mechanical Checks
Inspect the mounting flange bolts (between brake and motor) for looseness. Tighten immediately if loose (use a torque wrench to meet the motor's flange torque specification, typically 15–25 N·m for M6–M8 bolts).
Check the manual release button/lever (small, spring-loaded for emergency release): Press to confirm smooth release and automatic reset. Jamming may indicate rust or debris in the release mechanism.
Wipe the brake disc surface (integrated with the motor shaft or coupling) with a dry cloth to remove dust, oil, or metal shavings. Oil contamination will cause reduced braking force-use a non-corrosive degreaser if needed.
Electrical Checks
Inspect the power cable connector (usually a 2–3 pin plug) for fraying, oxidation, or loose pins. Ensure the connector is fully seated to avoid poor contact.
Verify the brake's release state when the motor is powered on: The brake should disengage quietly (no grinding or buzzing). If the motor fails to start, the brake may not be releasing properly.
2. Periodic Maintenance (Fixed Intervals)
Adjust intervals based on operating frequency (shorten cycles for high-duty applications: e.g., continuous operation or ≥500 cycles/h).
| Maintenance Cycle | Core Tasks | Details & Standards |
|---|---|---|
| 2 Weeks | Gap & Pad Thickness Check | - Measure the friction pad thickness: Replace if the friction material is ≤1.5 mm (original thickness: ~5–6 mm).- Check the pad retraction gap: Ensure both sides are equal (0.2–0.4 mm). Adjust via the built-in gap adjustment screw if uneven (do not over-tighten to avoid drag). |
| 1 Month | Lubrication & Fastener Re-Tightening | - Lubricate the guide pins and hinge points (small, hidden in the caliper) with high-temperature, low-viscosity lithium-based grease (apply a thin layer-over-greasing attracts dust).- Re-tighten the mounting flange bolts and caliper screws (check for thread wear or corrosion). |
| 3 Months | Electrical System & Spring Inspection | - Test the electromagnetic coil insulation resistance with a megger: Must be ≥1 MΩ at room temperature (replace the coil if lower, as low resistance indicates insulation damage).- Inspect the braking spring (internal, via caliper inspection window if available) for fatigue (no deformation or breakage). Test braking torque with a torque tester (ensure it matches the DJPZ-80's rated torque: typically 80 N·m).- Clean the electromagnet core (remove dust or rust with a soft brush) to ensure smooth armature movement. |
| 6 Months | Comprehensive Overhaul | - Disassemble the caliper (remove the outer cover) and clean all internal components (pistons, guide rods) with a clean cloth.- Replace the seal rings (small O-rings in the caliper) to prevent dust or water ingress (critical for motor-integrated designs to avoid motor damage).- Check the brake disc for wear: Resurface if there are deep scratches (≥0.15 mm) or replace if runout exceeds 0.08 mm (use a dial indicator to measure runout). |
3. Key Component Replacement Guidelines
The DJPZ-80's compact design means most components are replaceable without removing the brake from the motor (critical for minimizing downtime):
Friction Pads (Most Common Replacement)
Signs to replace: Thickness ≤1.5 mm, uneven wear, or cracking of the friction material.
Replacement steps:
Power off the motor and brake. Use the manual release button to open the caliper.
Remove the pad retaining clips (no need to disassemble the caliper or motor).
Install new non-asbestos pads (ensure they match the DJPZ-80's pad size: typically 40×30×5 mm).
Reset the retaining clips and adjust the pad gap to 0.2–0.4 mm (equal on both sides). Test the brake's release and braking functions.
Electromagnetic Coil
Signs to replace: Insulation resistance <1 MΩ, continuous buzzing, overheating, or failure to release.
Note: Replace with a coil of the same voltage rating (typically DC 24V/48V for motor brakes-confirm the model's specification). Ensure the coil is fully seated to avoid magnetic leakage.
Brake Disc
Signs to replace: Runout >0.08 mm, thickness reduction >20% of the original, or cracks.
Note: The DJPZ-80 often uses a disc integrated with the motor shaft or coupling-replace the entire coupling/disc assembly if damaged (ensure compatibility with the motor's shaft diameter).