Latest Products


Contact Us
- Wei Four Road, Weizhuang industrial Park, Changyuan District, Xinxiang City, Henan Province, China
- sales@zybc.com
- +86-373-7136666


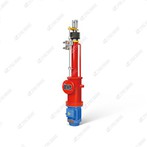
Ed121/6 Series Electro-hydraulic Thruster
Maintaining the Ed121/6 series electro-hydraulic thruster is critical to ensuring its stable thrust output, reliable response, and long service life. Below is a tiered maintenance guide covering daily checks, periodic maintenance, component replacement, and fault prevention, tailored to its...
Description
Maintaining the Ed121/6 series electro-hydraulic thruster is critical to ensuring its stable thrust output, reliable response, and long service life. Below is a tiered maintenance guide covering daily checks, periodic maintenance, component replacement, and fault prevention, tailored to its integrated motor-pump-cylinder structure.
1. Pre-Operation Daily Inspection (5–10 Minutes/Shift)
Focus on quick verification of key status indicators to avoid startup failures:
Oil Level & Quality Check
Observe the transparent oil level gauge: The oil level must be between the upper (MAX) and lower (MIN) marks. Refill with ISO VG46 hydraulic oil if low.
Check oil color: It should be clear and amber. If it turns dark, turbid, or contains impurities, drain and replace the oil immediately (contaminated oil causes pump wear and piston jamming).
Mechanical Status Check
Push/pull the push rod manually: It should move smoothly without jamming or abnormal resistance.
Inspect the push rod surface: Ensure there is no rust, scratches, or oil leakage at the seal. A slight oil film is normal; dripping oil indicates seal damage.
Check mounting bolts: Tighten any loose bolts (torque: 25–30 N·m for M8 bolts) to prevent vibration damage.
Electrical Status Check
Inspect motor cables and terminals: Ensure no fraying, oxidation, or loose connections. Verify proper grounding to prevent electric shock.
Test power-on response: After powering on, the motor should run quietly (no buzzing or grinding noise), and the push rod should extend to the rated stroke (60 mm) within 2–3 seconds.
2. Periodic Maintenance (Fixed Intervals)
Adjust maintenance cycles based on operating frequency (shorten for high-duty scenarios: ≥1000 cycles/day).
| Maintenance Cycle | Core Tasks | Details & Standards |
|---|---|---|
| 1 Month | Lubrication & Fastener Tightening | - Apply a thin layer of high-temperature lithium-based grease to the push rod guide sleeve (avoid over-greasing, which attracts dust).- Re-tighten all mounting and end cover bolts; check for thread wear or corrosion. |
| 3 Months | Oil Replacement & System Bleeding | - Drain the old oil through the bottom drain plug; flush the oil chamber with clean ISO VG46 oil.- Refill with new oil to the MAX mark; bleed air from the system: Power on/off 3–5 times to expel trapped air (air causes slow push rod response).- Inspect the oil seal and O-rings for aging; replace if cracked or deformed. |
| 6 Months | Pump & Motor Overhaul | - Disassemble the motor-pump assembly; clean the centrifugal pump impeller and filter screen (clogged filters reduce hydraulic pressure).- Check motor bearings for wear: Rotate the motor shaft manually-if there is a "grinding" sound, replace the bearings.- Test motor insulation resistance with a megger: It must be ≥1 MΩ at room temperature (replace the motor if resistance is too low). |
| 12 Months | Spring & Piston Inspection | - Remove the end cover; inspect the return spring for fatigue (no deformation, cracks, or reduced elasticity). Replace the spring set if it fails to reset the push rod fully.- Clean the piston and cylinder inner wall; remove carbon deposits or rust with fine sandpaper. Check for piston scoring-replace if damage exceeds 0.1 mm.- Calibrate thrust output: Use a force gauge to verify the rated thrust (1250 N); adjust the spring preload if necessary. |
3. Key Component Replacement Guidelines
| Component | Replacement Signs | Replacement Steps | Notes |
|---|---|---|---|
| Oil Seal/O-Rings | Oil dripping from push rod or end cover; seal cracking | 1. Power off and drain oil.2. Remove the end cover and push rod.3. Replace with original-size seals; lubricate with hydraulic oil before installation.4. Refill oil and bleed air. | Use only oil-resistant nitrile rubber seals; avoid over-tightening the end cover (causes seal deformation). |
| Motor Bearings | Motor noise; shaft rotation jamming | 1. Disconnect power and remove the motor fan cover.2. Press out the old bearings with a press tool.3. Install new bearings (matching model: 6202ZZ); lubricate with bearing grease.4. Reassemble and test motor rotation. | Do not strike bearings with a hammer; this damages the inner race. |
| Return Spring | Push rod fails to reset; thrust drops below 1000 N | 1. Drain oil and remove the end cover.2. Take out the spring set (do not mix spring order).3. Install a new spring set (same stiffness as original).4. Reassemble and calibrate thrust. | Replace the entire spring set (do not mix new and old springs). |
| Pump Impeller | Low thrust; slow push rod extension | 1. Disassemble the motor-pump unit.2. Remove the impeller and check for blade damage.3. Install a new impeller; ensure it is aligned with the pump shaft.4. Test hydraulic pressure after reassembly. | Impeller wear reduces oil flow-replace immediately if blades are chipped. |
4. Maintenance for Special Operating Conditions
High-Dust Environments (Mining, Construction)
Install a dust cover on the push rod and motor ventilation holes to prevent dust ingress.
Shorten oil replacement cycles to 2 months; clean the pump filter monthly.
Low-Temperature Environments (-25℃ to 0℃)
Replace ISO VG46 oil with low-temperature hydraulic oil (ISO VG32) to avoid oil thickening.
Preheat the thruster for 5–10 minutes before operation (via motor idling) to improve response speed.
High-Temperature Environments (40℃ to 50℃)
Clean motor ventilation holes weekly to prevent overheating (motor surface temperature ≤60℃ during operation).
Use high-temperature resistant seals (FKM material) to avoid aging.
5. Post-Maintenance Verification
After any maintenance or replacement, perform these tests to confirm normal operation:
Power-on Extension Test: Push rod extends to 60 mm smoothly; no jamming or abnormal noise.
Power-off Reset Test: Push rod retracts fully within 1–2 seconds after power cut.
Thrust Calibration: Rated thrust reaches 1250 N; consistent across 5 consecutive cycles.
Leakage Test: Run continuously for 30 minutes; no oil dripping from seals or joints.
Hot Tags: ed121/6 series electro-hydraulic thruster, China, manufacturers, supplier, factory, customized, hoist safety crane brake, Electro Hydraulic Thruster Disc Brakes
You Might Also Like